Build a Neovim Configuration
How and why Neovim can be one of your most vital development tools.
The fact you’ve ended up here leads me to believe you are already somewhat familiar with both Vim and Neovim to a certain extent. For those unaware, Neovim is a refactor of Vim, and describes itself as a hyperextensible Vim-based text editor.
What makes Neovim so powerful and popular is just that, its hyperextensibility, you can tailor your configuration to suit just about any need you have, and very few setups are the same. It is also worth mentioning that Neovim is not an IDE, and is not trying to be either. Whilst you can certainly develop, and develop efficiently with Neovim, it does not include features you’d tend to find with an IDE such as debugging, and that’s alright. It is still hands down one of, if not the best text editor out there.
This post will guide you through the steps of how to install Neovim, setting up your configuration and plugin manager, I’ll show you how to install any plugins that interest you, as well as activate language support for your favorite programming languages. I’m running Ubuntu 20.04 so this guide will be Linux/Darwin based mostly but I’ll link a couple of my recommended articles for Windows at the end, but a lot of this stuff is cross-platform so don’t worry.
Installing Neovim
Installing Neovim has actually become quite simple recently. There’s pre-built binaries which are available on the Neovim releases page. I would recommend however using the Homebrew package manager. Whatever route you take for installation just make sure the version is greater than v0.5.0 as some plugins don’t work before that version. This guide was built using v0.7.0.
Homebrew
With Homebrew installed, run the following command:
brew install neovim
You may have some recommended commands to run so pay attention to the output when the install command is ran. If done successfully you’ll have installed Neovim and you can go ahead and open a new terminal.
To start Neovim, simply run:
nvim
You should be brought to the Neovim landing page:
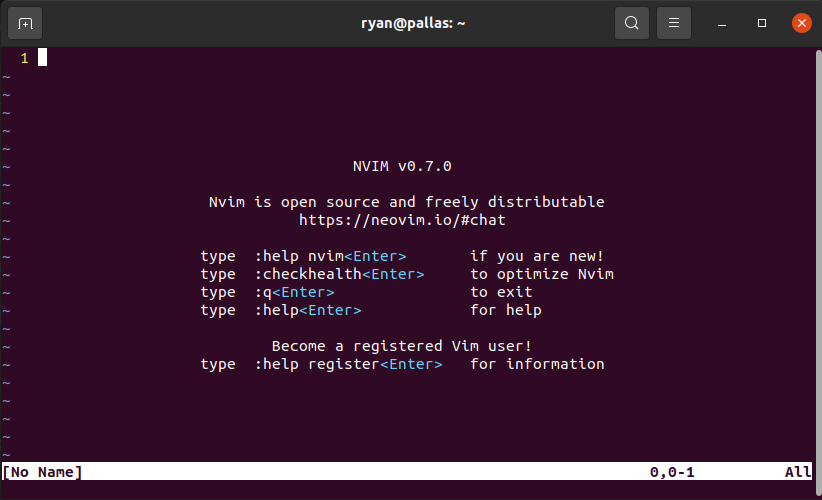
If you weren’t, there may have been a problem during installation, try installing again via Homebrew and make sure you run the commands it recommends also. If all good so far, let’s carry on.
As you can see from the landing page, we’ve got a couple of options out of the box, what we want to do first is check health. So with the landing page open, run:
:checkhealth
It’s expected that you run into something similar as this:
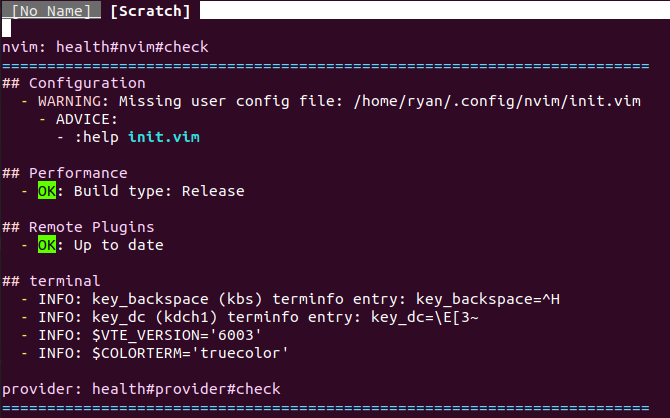
We’ve no configuration file, so let’s add that now by following what it
recommends. I’m going to add a folder called nvim to my hidden directory
.config, which is in root /. Inside my nvim directory, I’m
going to create a file called init.vim. In your terminal, that process will look
something like this:
        ryan@pallas:~$ cd ~/.config/
        ryan@pallas:~/.config$ mkdir nvim
        ryan@pallas:~/.config$ cd nvim
        ryan@pallas:~/.config/nvim$ touch init.vim
        ryan@pallas:~/.config/nvim$ ls
        init.vim
At this stage, re-open the Neovim landing page and run checkhealth again
to make sure it can find your configuration file.
If complete, that’s us setup nicely to begin creating our configuration file.
To open init.vim in Neovim, run:
nvim ~/.config/nvim/init.vim
You’ll be brought to an empty file, and we can begin adding our preferences.
Settings
When it comes to setting your preferences in your init.vim file, everyone is
going to be different. As we move down through what we can do, feel free to
omit or add any ‘sets’ you like or dislike. To get started, here’s a couple
basics to get you up and running.
        set nu
        set tabstop=8 softtabstop=8
        set shiftwidth=8
        set expandtab
        set smartindent
        set hidden
        set noerrorbells
        set nowrap
        set incsearch
        set scrolloff=8
        set colorcolumn=80
        set signcolumn=yes
Install Plugin Manager
There are a couple of plugin managers we can use but I recommend using vim-plug, it will be used for the remainder of this guide.
Install vim-plug
Navigate to your ~/.config/nvim directory and create an autoload directory
and jump inside of it.
        ryan@pallas:~$ cd ~/.config/nvim
        ryan@pallas:~/.config/nvim$ mkdir autoload
        ryan@pallas:~/.config/nvim$ ls
        autoload  init.vim
        ryan@pallas:~/.config/nvim$ cd autoload/
        ryan@pallas:~/.config/nvim/autoload$
While in your autoload directory, run the following command to download
vim-plug.
curl https://raw.githubusercontent.com/junegunn/vim-plug/master/plug.vim -o plug.vim
You should now see a plug.vim file, and that’s it as far as installation
goes, next we’ll look at how to install plugins.
Install plugins
Navigate back to your init.vim file and open it up using nvim. You should be
getting the hang of that now. We install plugins via vim-plug by placing their
source between a begin and end call, like so.
        call plug#begin('~/.config/nvim/plugged')

        -- Plugin 1 goes here
        -- Plugin 2 goes here
        -- etc, etc, etc

        call plug#end()
Let’s test out our plugin manager is working by installing a theme, I’m going
with the tried and true, Gruvbox.
Installing plugins is easy, simply place the source of the plugin you wish to
install, then run :PlugInstall.
        call plug#begin('~/.config/nvim/plugged')
        Plug 'morhetz/gruvbox'
        call plug#end()
:PlugInstall
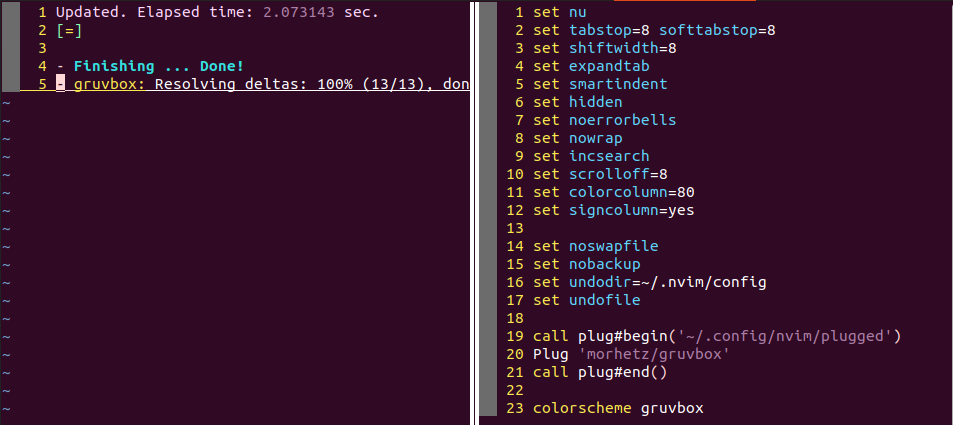
Notice we’ve also added a colorscheme setting to our configuration.
Plugins are usually really easy to install, but I’ll run through the most important ones here, and simply mention the ones I also recommend installing.
Telescope (fuzzy finder)
To install telescope, install the plugin and it’s dependency with plugged:
        Plug 'nvim-lua/plenary.nvim'
        Plug 'nvim-telescope/telescope.nvim', { 'tag': '0.1.0' }
        -- or, { 'branch': '0.1.x' }
You’ll also need ripgrep if you want to use live grep (you do). This can be
found on Homebrew.
I would also recommend installing ’telescope-fzf-native’ alongside it:
Plug 'nvim-telescope/telescope-fzf-native.nvim', { 'do': 'make' }
Again, this has some dependencies, you’ll need gcc or clang, as well as
make. As always, these are on Homebrew.
To use telescope, I’ve also imported the recommended usage settings:
        -- Find files using Telescope command-line sugar.
        nnoremap <leader>ff <cmd>Telescope find_files<cr>
        nnoremap <leader>fg <cmd>Telescope live_grep<cr>
        nnoremap <leader>fb <cmd>Telescope buffers<cr>
        nnoremap <leader>fh <cmd>Telescope help_tags<cr>

        -- Using Lua functions
        nnoremap <leader>ff <cmd>lua require('telescope.builtin').find_files()<cr>
        nnoremap <leader>fg <cmd>lua require('telescope.builtin').live_grep()<cr>
        nnoremap <leader>fb <cmd>lua require('telescope.builtin').buffers()<cr>
        nnoremap <leader>fh <cmd>lua require('telescope.builtin').help_tags()<cr>
At this stage, you must also select a leader key, I’ve always chosen ‘space’, but you can select whatever you prefer.
let mapleader=" "
Install your plugins and you can test the run by holding leader, and ‘ff’. A search window should pop up and you can search for files. It’s also worth checking that grep is working too with leader and ‘fg’.
vim-go
This is where Neovim really becomes personal, I tend to develop a lot in Go, and my Neovim config reflects that. This is an example of installing language specific plugins to enhance your development experience. Feel free to skip this part if you’re not interested in Go.
Arguably the most important plugin for Go development is vim-go, created by Fatih Arslan. I recommend reading through the README in the repo to get a solid understanding of what it brings to the table but to get started quickly you can install it adding the plugin:
Plug 'fatih/vim-go', { 'do': ':GoUpdateBinaries' }
Then run :GoInstallBinaries and that should be it. You can also check out Fatih
talk about vim-go here https://youtu.be/7BqJ8dzygtU
Auto Completion
Auto completion is something we simply expect from editors and IDE’s these days, and everyone has their preferences, I’ve tried a bunch but I always find myself returning to CoC, or Conquer of Completion.
Plug 'neoclide/coc.nvim', {'branch': 'release'}
When inside your project directory, simply install your LSP and you’re good to go. Those LSP’s can be found here. In my case I’ll install my preferred LSP for Go:
:CocInstall coc-go
Full implementation details and support can be found via CoC’s GitHub and they’ve even got some sample configurations on show.
Wrap up & next steps
If you’ve followed along, you should have a pretty solid setup to get you rolling. I do also hope you ventured off the path and tailored your config to your liking as well, that’s what it’s all about, making it yours.
As for going forward, I’d suggest getting confortable with the base provided here and then continue to build out your configuration. It’s also a wise idea to push your config to GitHub, or your chosen platform to track changes and even share with others.
Regarding Windows users, I’d be surprised if the bulk of what’s discussed here doesn’t also work for you. I have however found a great guide for Windows by jdhao to help you along your way.
That’s it from me, you can follow me on Twitter if you’d like to keep up with what I’m doing, make sure to say hi.
Thanks for taking the time to read through this guide, I do hope it’s helped. Happy (N)vimming!